expr:class='quot;loading" + data:blog.mobileClass;
.post h3 {display: none !important;}

Sunday, March 18, 2012

Roof replacement

And...here we go!  The back left corner is as good a place as any to get started.
Underneath it all was this beautiful ship lap wood.
We found some of this wood in the attic after we moved in. We didn't know where it came from, but we loved it so much that we made doors from it.
A door for the pantry's utility sink.
A door for the first custom dresser that Tim built.
Two doors for the other hand made custom dresser that Tim made.

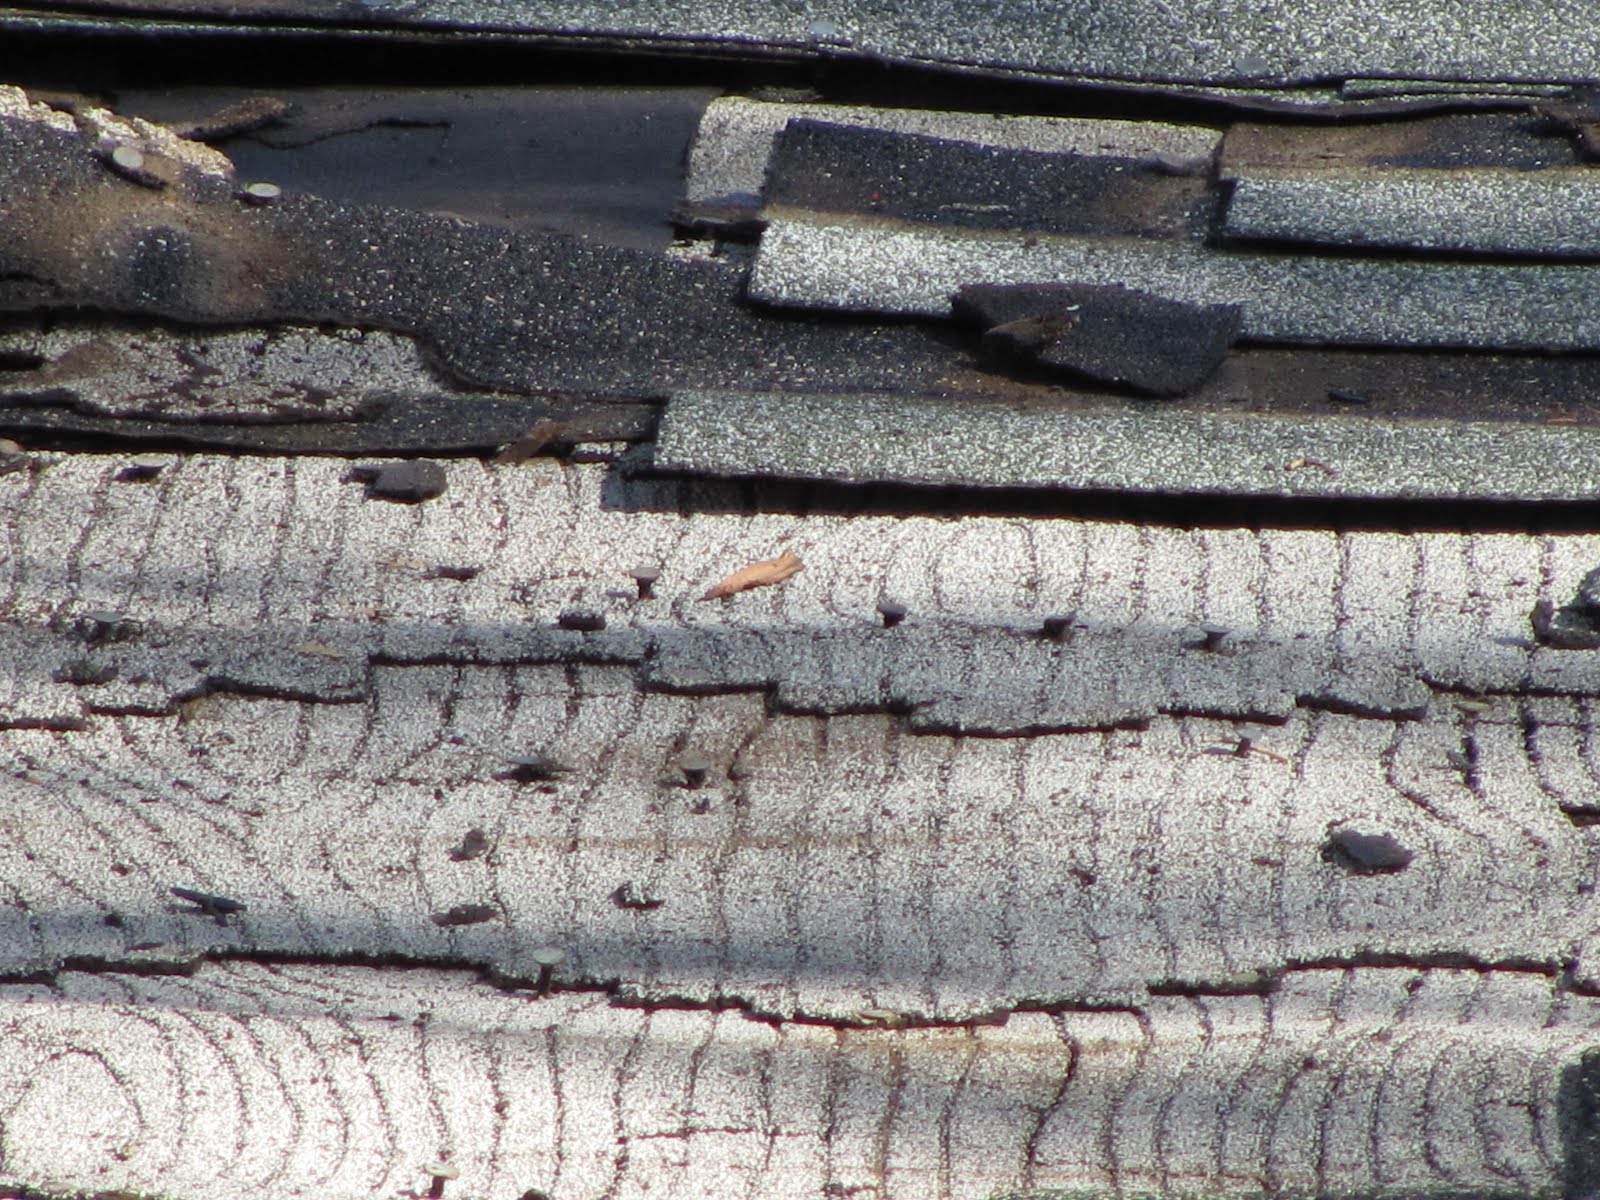
Back to the roof....Now that's some cool looking roofing material.
There were about 7 layers  on this roof.
As near as we can tell....Every single layer that has ever been put on this roof since 1924..including the original shake shingles.

Look like this might take a while.
One side almost done.

Brand new decking.
Some paper.
Right after this picture was taken, Tim fell off the roof.
So...as creative as he is....he built a safety system
It worked like a charm.

Now to the front side of the roof.
We'll just rip out that chain link fence and drive the truck right up to the roof line.
Looking good.


Tim says,"Can you finish this for me?"
Looks like there were a few soft spots under all that mess.

What a messy, messy job.


Paper on the front....yeah
Now...how to get those heavy stacks of shingle onto the roof?
Tim will figure something out....and he did.
Isn't this neat.


The final picture is not posted because we still need to stucco those dormers. We're such 90 percenters!!!!

Monday, February 27, 2012

Just a utility basement

Here, you can see the entrance door to the basement.
And yes, it is that short.
I'm 5'5" and I still have to duck my head going in and out, at the top and at the bottom of the stairs.
Open the door and there's not much to see...

just a bunch of junk.


At the bottom of the stairs, you see the furnace and the washer..the bucket you see next to the furnace is there to collect the condensation that the furnace produces, from being a high efficiency furnace.  Tim rigged it up with a sump pump and float and when the pump turns on the water is siphoned into the holding bucket that is mounted above the washer.


when you look up you can see the holding bucket for the water that comes from the Reverse Osmosis System and the furnace.
the dryer
 
Here's the Reverse Osmosis system with the filters and the holding tank. That baby cost 200 dollars.  Filter replacements cost 200 dollars a year plus whatever the water cost is.  Because it takes about 15 gallons of water to make 2 gallons of filtered water.  And then it costs 100 dollars a year to maintain the filter that is inside the refrigerator.
And that's the price we pay to have decent drinking water here in Fountain, Colorado.
Further back and behind the furnace you can see the 50 gallon water tank and a dug out space...storage for paint.
Time to duck and go back up the stairs.
You can see how the McConnaughhay's chiseled out the foundation wall in 1963 to put this basement in.
Here's a closer look at all the junk I have at the top of the stairs.
Just this year we insulated the walls, the ceiling and the door.  Before that, there was a huge, heavy trap door that closed over the top of the stairs.  It wasn't very efficient at keeping the warm air in and the cold air out.

Thursday, February 9, 2012

Swamp Cooler installed

After 15 years, it was finally time to put the swamp cooler in its permanent position.
This took some brainstorming.
And we realized that since we were able to successfully vent hot air from the furnace to the upstairs bedroom through the wall cavity, that we should also be able to vent cool air from the swamp cooler to the downstairs through the ceiling cavity.
So that's what we did.
We put the swamp cooler up high and created a shaft and directed the cool air through the ceiling joists.


First we had to make a homemade lift to get it up there...
yep, that should do it.
and..yes..that hot tub was very much in the way..... but...we didn't want to empty it and move it...so we just did it the hard way.
There's was no one to document the terrifying act that it took to maneuver the swamp cooler on the lift and around the hot tub and up into the air and onto the platform....sorry...I know you would have enjoyed that part.


When Denise saw this view from the inside she said, "Oooo...I want a window in all four of my storage spaces!"

Here's my calm, cool and collective Tim giving me a smile after the scary stuff just happened. I was still shaking and hysterical when I grabbed the camera to capture Tim in action.

And on the inside....here's Tim using his creative ability to create a shaft that will take the air down into the ceiling joists and out the vents that are in the ceiling in the kitchen.

Friday, February 3, 2012

The original stair case

The original stair case was very beautiful and unique, but so impractical for getting furniture up or down.
We started the remodeling project in the upstairs of the house and it was impossible to get a full sheet of drywall up those stairs...matter of fact...the kids had to help us thread the drywall through the upstairs bedroom window, after it was completely removed down to the framing.
So..Tim rebuilt the stairs and made them come straight down.


Ohhh... you meant straight down like this.....

Thursday, January 12, 2012

Kitchen remodel

Kitchen remodel of 1924 home

We were able to preserve and reuse the original Douglas Fir flooring.
The one island that you can see and the countertop on the other side of the stove is also made from some of the original Douglas Fir flooring.
This was a complete gut and install project.
You can see the remnants of what used to be a wall with a swing door just behind the chandelier.
The swing door was utilized on the other side of the refrigerator, where we built a pantry.
There used to be a window, where the back door is located.
We had to cut through 8 inches of solid concrete to open up the lower portion of the exterior wall in order to install that door.

--------
And here's a picture of the swing door doorway.
The big room that you are looking into was the original dining room....
I really miss that big dining space.
But, it's a small house....I couldn't have it all.

If you look through the swing door opening you can see a white framed doorway...that's where the original bathroom was.
And the small yellow room that is also over there, was the teeny, tiny...no countertop kitchen.

Below, I am standing in that bathroom doorway to get a picture of the kitchen. 
The table that is next to the refrigerator was my countertop.
The refrigerator is in front of the window that was converted into the back door, as explained above.